Sunday, March 29, 2009

All things girl!

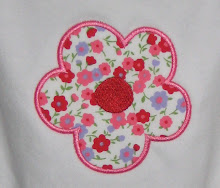
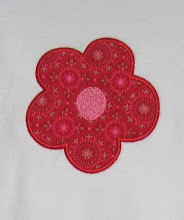
Sisters flower outfits - the bubble comes in one size 6-12 months. The dress comes in size 4 and 6. Below is a picture of the back of the dress. I am also putting this flower on the empire waist dress available in more sizes. It would be cute with a monogram in the flower (or first initial)!


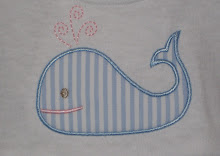
A cute whale! I am working on brother's version to match.

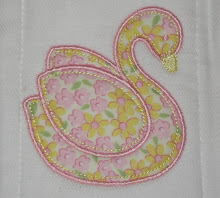
Swan

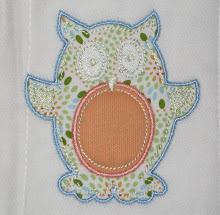
Owl

Thursday, March 26, 2009

New Blog

Visit our new 'family blog' here!

Tuesday, March 24, 2009

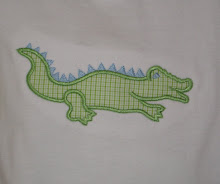
Crabs and Alligators

So sorry it has taken so long to post! The whole knee surgery took me out of commission longer than I anticipated but I'm back. Below are some new outfits.


Boy crab outfit (sister's dress is coming)


Brother and Sister Alligator Outfit (I am thinking of adding more to make the dress more frilly)


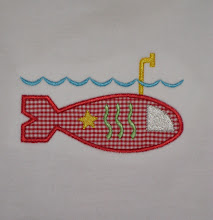
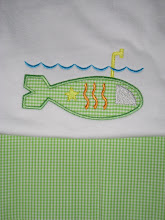
Boy's Submarine outfit


And if that wasn't enough....how many of you 'trim back' your crept myrtle's like this...with a chain saw! Ours are huge! I was really scared to cut this this much but Troy assured me they wouldn't go into shock and would be fine. Just today I noticed two or three buds. Spring is here!

Saturday, March 7, 2009

ACL Surgery

Thursday went well... I told Troy last night (around 1am) that this has definitely helped me sympathize with others  that are ill. I am not a 'sickly' person and I always joke that mercy is not my spiritual gift but I can say I am going to try and do better....You just don't realize how much we need each other! I am so blessed!
I hope to be sewing early next week. I have a cute whale, crab and alligator to post. I promise to get them up in the next few days. I am trying to post pictures in brother/sister photo sets for those of you that like your little ones to match. 
My dad and I made an AWESOME sewing table last weekend - I can't wait to post pics of it too!
Thanks for all of you that have been praying and checking on me! I really appreciate it!

Sunday, February 15, 2009

A little tutorial...

So let me start out by saying I am not a sewer! I make very easy things and ask my mom hundreds of questions. Slowly but surely I am getting a little more nerve to try things on my own. I get a lot of ideas from boutiques in town. This idea came for a diaper cloth I saw in a cute store in Ocean Springs Friday. I thought to myself...I can do that! They were charging $22 for theirs - mine cost $3.50 - yes - $3.50!

So, with that said, below is a brief tutorial (with probably too many pictures - but I always wish there were more pictures) for a diaper cloth. We have three friends having babies around the same time and my goal was to make something quick, custom and handmade for them!

If you make one, please leave me a comment!

Materials Needed:
- 1 bath towel (mine was from Wal-Mart for $3.50 and made 9 diaper cloths) OR any soft/durable fabric. You could use minky dot but I HATE sewing on it! You could even sew this to a normal diaper cloth.
- 9x14 remnant piece of fabric
- Sewing machine
- Scissors
- Size of your desired cloth - mine was 9x14 but it can be any size!

STEP 1:
Cut one 9x14 rectangle out of both fabric and towel (I cut off all edges of the towel until all I had was inside of towel with no binding or designs to cut pieces from). I typically machine wash and dry my fabric before using so it doesn't shrink or bleed. I also starch and iron it once I have cut the rectangle.
STEP 2:
Place right sides of fabric together. This is easy since the towel doesn't have a right and wrong side.
STEP 3:
Sew down 3 sides sewing fabric and towel together. I did this on a serger. If you have a sewing machine I recommend sewing the seams pretty tight (on a short length). I would then cut off the excess outside the seam so it doesn't bunch in your finished cloth.
STEP 4:
Sew half way down last end that hasn't been sewn yet and STOP! You will need this opening in the fabric to turn the cloth inside out.
STEP 5:
Pull fabric and towel through opening.

STEP 6:
Now we will complete the few inches you just pulled the fabric through. Fold the fabric and towel into the inside of the cloth to create a clean finished edge. You can sew this shut now or pin it to be sewn together when the finish sewing is done. The second option is what I prefer.

STEP 7:
I think it is a good idea to sew a straight stitch about .25 inch inside the edge of the finished cloth. This will make sure when the cloth is washed it will not lose its shape. This is also when you can sew the opening shut.

STEP 8:
Iron and you are done! Wasn't that FUN! I made about 9 in an hour and used some cute fabric I have been dying to sew on! Below you will see other samples. For those with embroidery machines you can add names, initials or appliques too! I even added ric-rac!
ENJOY!


Wednesday, February 11, 2009

Troy...a funny guy!

Bec sent me these pictures of Troy from the trip. I think they are hilarious! The first is of him 'getting air' and the second is him feeding a bird while ridding up a lift. Funny guy!


Tuesday, February 10, 2009

Ski Trip

Troy and I recently went skiing with dear friends Justin and Rebecca Goldman in Steamboat Springs, Colorado. We had a great time! They are great skiers and Troy had a lot of fun with them. Unfortunately I took a hard fall the second day and tore my ACL. My orthopedist has assured me I will be able to ski again after a fresh ACL from my hamstring is put in March 5th (say a prayer it goes well). They took such good care of me!


I am hard at work on spring clothes for Bluebird Hill. I really hope to post more pictures soon. I am on a roll with boys clothes. The girls are slower coming for some reason. For those of you that like unique fabric I just found this website off another blog - check it out - http://www.fabricworm.com/index.html